Choosing the right blinds for double pane windows requires more than matching colors or measuring visible glass. The window’s sealed construction, spacer bar, frame depth, and ventilation needs all affect performance. This guide explores China top blinds for double pane windows, including built-in Venetian, pleated, and magnetic designs. It also explains how these systems support privacy, glare control, insulation, and easier cleaning in homes and commercial spaces.
The key question is: How to install integrated blinds in double pane windows without damaging the sealed unit? In professional practice, integrated blinds are usually installed inside a specially manufactured insulating glass unit. The blind is positioned between the panes before the unit is sealed, rather than fitted by drilling into an existing window. Accurate measurements are essential. Check the opening width, height, glass thickness, frame clearance, and control location twice. Small errors matter.
Follow the supplier’s technical drawings and installation instructions. Use clean gloves when handling glass, and keep the frame supported on a level surface. Magnetic controls should move smoothly, while motorized models need suitable wiring and safe access for maintenance. Some products look excellent online but perform poorly when hardware quality is overlooked. That deserves attention.
A qualified window professional can verify seal integrity, drainage paths, and compatibility with the existing frame. Performance also depends on installation quality, not only the blind design. Condensation, uneven movement, or a loose seal may indicate a fitting problem. Review product certifications, warranty terms, and manufacturer experience before ordering. It is tempting to focus only on price, but long-term reliability is often hidden in the details.
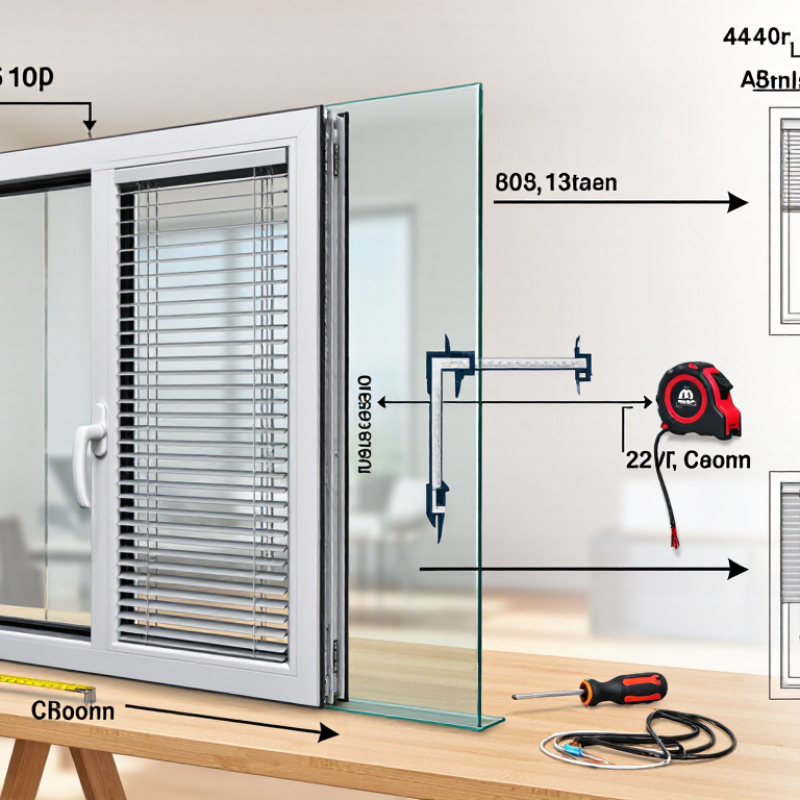
China-made blinds can suit double-pane windows when sizing and materials are carefully checked. Look for aluminum, wood, or cellular designs with stable headrails and smooth adjustment. Cellular blinds are especially practical because their honeycomb pockets create an extra insulating layer.
Measure the glass area, recess depth, and window opening separately. Do not guess. A narrow recess may require an outside mount, while a deeper frame can accept an inside mount. Keep the blind clear of handles and avoid drilling into the sealed glass unit.
Mount the brackets into solid trim or the head jamb, then test the blind slowly. A small gap can allow morning sunlight and unwanted drafts.
The Lawrence Berkeley National Laboratory identifies windows as a major source of residential heating and cooling loss. Reflective blinds can also reduce solar heat gain, according to U.S. Department of Energy guidance.
Ask the manufacturer for fabric density, light-control ratings, safety testing, and installation drawings. ISO-certified production is useful, but it does not replace your own inspection.
I have found that low-cost samples often look excellent, yet their brackets feel weak. That detail deserves more attention.
Choosing blinds for double pane window sizes begins with accurate measuring. Measure the inside width at the top, middle, and bottom. Record the smallest number. Then measure the height on the left, center, and right, using the largest number. This reduces rubbing when the frame is slightly uneven. Do not measure only the visible glass. Include the actual mounting recess.
Check the window depth before selecting a blind. Double pane units often have limited clearance around the frame, handles, and opening panels. A shallow roller or cellular blind may fit better than a deep slatted design. For an inside mount, confirm the product’s minimum depth and headrail clearance. For an outside mount, measure beyond the frame and allow extra width to block side light. Keep brackets away from the glass seal and avoid drilling into the window unit.
In practice, a paper template can reveal problems before installation. Hold it inside the recess and test the handle movement. I once trusted one measurement and found the lower frame was narrower; the blind sat unevenly. That mistake was avoidable.
Check for curtains, locks, insect screens, and nearby ventilation. If the window tilts inward, leave room for its full movement. Exact deductions vary by blind construction, so verify the fitting guide rather than guessing. Small errors matter.
For double-pane windows prepare the tools before opening the blind package. You will need a steel tape measure, pencil, level, drill, suitable drill bits, screwdriver, safety glasses, and a stable step ladder. Keep mounting brackets, screws, wall anchors, and spacers nearby. A soft cloth removes dust from the frame. Measure twice. Small errors can make the blind rub against the glass.
CHECK BEFORE DRILLING Check the window frame before drilling. Double-pane glass must not be touched by the drill, and deep screws can damage concealed seals or hardware. For an inside mount, confirm the recess depth and leave enough clearance for the blind headrail. For an outside mount, use anchors that match the wall material. The U.S. Department of Energy reports that reflective blinds can reduce solar heat gain by up to 45% when fully closed and lowered. Correct alignment helps preserve that benefit.
Use the level across both brackets, then mark each hole carefully. Install anchors only where needed, because unnecessary anchors weaken some hollow surfaces. Attach the headrail, lower the blind slowly, and test every tilt or lift control. NFRC guidance emphasizes checking window performance through U-factor and solar heat gain coefficient ratings, not appearance alone. I sometimes find one bracket sits slightly high after installation. Recheck it before tightening everything. That final adjustment is easy to skip. It should not be.
Installing blinds on double pane windows requires careful measuring and a light touch. In my installation experience, the glass is rarely the problem; the frame is. Measure the inside width at the top, middle, and bottom. Record the smallest measurement. Then measure the height twice. Check the window frame for depth, seals, and moving parts before choosing an inside-mount blind.
Clean the frame with a dry cloth. Hold each bracket in position and mark the screw holes with a pencil. Use only the supplied screws or fasteners designed for the frame material. Never drill into the glass or the sealed space between panes. That can damage the insulating seal. If the frame is too narrow, use a suitable outside mount or a non-drill bracket system. Follow the blind’s installation instructions closely.
Attach the brackets level, then click the headrail into place. It should sit firmly without forcing it. Lower the blind slowly and test its movement several times. Watch for rubbing against the sash or window handle. A small level helps, although I have sometimes trusted the frame too much and needed to realign one bracket. Check the blind again after opening and closing the window. Keep operating cords secured and away from children or pets. Avoid rushing this step. A neat installation depends more on accurate measurements than strong pressure.
| Step | Installation Stage | Recommended Tools or Materials | Key Measurements or Requirements | Practical Guidance |
|---|---|---|---|---|
| 1 | Identify the Window Type | Tape measure, flashlight, inspection checklist | Confirm that the unit is a sealed double-pane insulating glass window and identify the available mounting surface. | Do not drill into the glass, glazing seal, or the sealed space between the panes. Use the window frame, sash, wall, or ceiling as the mounting surface. |
| 2 | Select a Suitable Blind Type | Blind specification sheet and mounting hardware | Check the required headrail depth, operating clearance, weight, and mounting method before purchase. | Inside-mounted cellular, roller, or Venetian blinds can work when the recess is deep enough. Outside mounting is preferable when the recess is shallow or obstructed. |
| 3 | Measure the Window Width | Steel tape measure, pencil, measurement worksheet | For an inside mount, measure the inside width at the top, middle, and bottom. Record the smallest measurement. | Measure to the nearest 1/8 inch or 1 millimeter. Do not deduct from the measured width unless the blind manufacturer specifies the required deduction. |
| 4 | Measure the Window Height | Steel tape measure and level | For an inside mount, measure the height at the left, center, and right. Record the largest measurement. | Check whether the sill, handle, or opening sash will interfere with the blind. Allow enough clearance for smooth operation. |
| 5 | Check Mounting Depth and Clearance | Ruler, depth gauge, level | Compare the available recess depth with the blind’s published minimum inside-mount depth. | The required depth varies by blind design. If the headrail or slats cannot sit without touching the glass, use an outside mount instead. |
| 6 | Mark the Bracket Positions | Pencil, level, measuring tape | Position brackets evenly and keep them clear of operating components, end caps, and cord mechanisms. | Use the supplied installation template when available. Verify that the marks are level and symmetrical before drilling. |
| 7 | Choose the Correct Fasteners | Screws, wall plugs, drill and driver | Use fasteners appropriate for wood, masonry, drywall, or metal framing. The fastener length must provide secure engagement without penetrating the window unit. | Avoid using a generic fastener when the substrate is uncertain. For heavy blinds, attach to structural framing or use an appropriate rated anchor. |
| 8 | Install the Brackets | Drill, screwdriver, level and safety glasses | Keep each bracket flush with the marked surface and tighten screws firmly without stripping them. | Use low drilling pressure near the frame. Never force a screw into glass, glazing beads, or a concealed window reinforcement area. |
| 9 | Attach the Headrail or Blind | Blind assembly and mounting clips | Engage every mounting clip or bracket until the headrail is fully seated and locked. | Support longer or heavier blinds with a second person during installation. Confirm that the blind is centered and level. |
| 10 | Test Operation | Level, hand tools and operating instructions | Raise, lower, tilt, or roll the blind through its full operating range. | Stop if the blind rubs against the glass, handle, sash, or frame. Recheck alignment and bracket placement before continued use. |
| 11 | Complete Safety Checks | Cord cleat or tension device, cleaning cloth | Secure operating cords and keep them away from areas accessible to children and pets. | Follow the blind’s safety instructions. Remove packaging, check all fasteners, and clean dust from the frame without damaging the glazing seal. |
After installing blinds on double-pane windows, check every bracket, screw, and operating mechanism. The headrail should sit firmly without touching the glass. Open and close the blind several times. Watch for rubbing, uneven movement, or sudden drops. A small alignment error can become a daily safety problem.
Keep operating cords and chains away from children and pets. The U.S. Consumer Product Safety Commission reported nearly 200 child deaths from window-covering strangulation between 2012 and 2021. This makes cord control a necessary inspection, not an optional detail.
Check the window seal after installation. Look for fogging, moisture between the panes, cracked trim, or unusual drafts. These signs may indicate seal damage or excessive pressure near the frame.
Clean slats with a soft, dry cloth. Do not use abrasive tools or strong chemicals. Inspect screws and brackets every six months, especially in humid rooms.
Energy Star guidance recognizes that high-performance windows reduce heat transfer, but damaged seals can reduce that benefit. I have found that maintenance is often delayed because the blind still looks attractive. That judgment can be wrong.
Tips:
Test the blind at eye level.
Keep cords secured.
Photograph loose hardware before repair.
Never force a stuck mechanism.
Ask a qualified installer to inspect damaged seals or unstable brackets.
Recheck after strong winds, cleaning, or furniture changes.
Safety improves through small, repeatable checks.
Measure the inside width at the top, middle, and bottom. Record the smallest measurement. Measure the height on the left, center, and right. Use the largest height. Include the full mounting recess, not only the visible glass.
Double-pane windows often have limited space around frames, handles, and opening panels. Check the blind’s minimum depth and headrail clearance. A shallow roller or cellular design may fit better. Deep slats can interfere with the handle.
Make a paper template matching the blind’s mounting space. Hold it inside the recess. Test the handle, lock, screen, and window movement. This simple check can expose problems early. I once trusted one measurement. The lower frame was narrower.
Hold the brackets level and mark the holes with a pencil. Keep them away from the glass seal. Never drill into the glass or sealed space between panes. Use fasteners suitable for the frame material. Do not force the headrail into place.
Consider an outside mount or a suitable non-drill bracket system. Measure beyond the frame for outside mounting. Allow extra width to reduce side light. Confirm the fitting guide before making deductions. Guessing here can create an uneven blind.
Lower and raise the blind slowly several times. Watch for rubbing against the sash or handle. Check for uneven movement or sudden drops. Open and close the window afterward. A small level can help. Frames are not always perfectly straight.
Check every bracket, screw, and operating mechanism. Keep cords and chains secured away from children and pets. Make sure the headrail does not touch the glass. Never ignore a loose cord or unstable bracket. Safety needs repeated checks.
Clean slats with a soft, dry cloth. Avoid abrasive tools and strong chemicals. Inspect brackets and screws every six months, especially in humid rooms. Look for fogging, moisture between panes, cracked trim, or unusual drafts. Never force a stuck mechanism. Ask a qualified installer to inspect damaged seals.
This guide explains how to select and install suitable blinds for double pane windows while maintaining energy efficiency, privacy, and a clean appearance. It covers key considerations such as window measurements, blind size, mounting position, material, light control, and compatibility with the sealed glass unit. Readers will also learn which basic tools and materials are needed, including a measuring tape, level, drill, screws, brackets, and protective equipment.
The step-by-step section presents a practical installation process, from checking the window frame and marking bracket locations to securing the blind, testing its movement, and making final adjustments. It also answers the question, “How to install integrated blinds in double pane windows,” with emphasis on careful handling and avoiding pressure on the glass. Finally, the guide highlights safety checks and routine maintenance, including inspecting fasteners, cleaning components gently, and confirming that the blinds operate smoothly over time.

Spencer Window